Tuesday, December 31, 2013

End of the School Year Thank You Cupcakes - June 2013

Since it was my son, Caleb's, last year at the elementary school I made these cupcakes as a thank you for the staff and teachers that had been part of his elementary years.

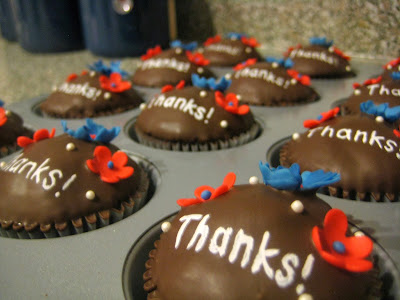
Teacher and Staff Thank You Cupcakes - Angled View

Teacher and Staff Thank You Cupcakes - Group Close-Up 1

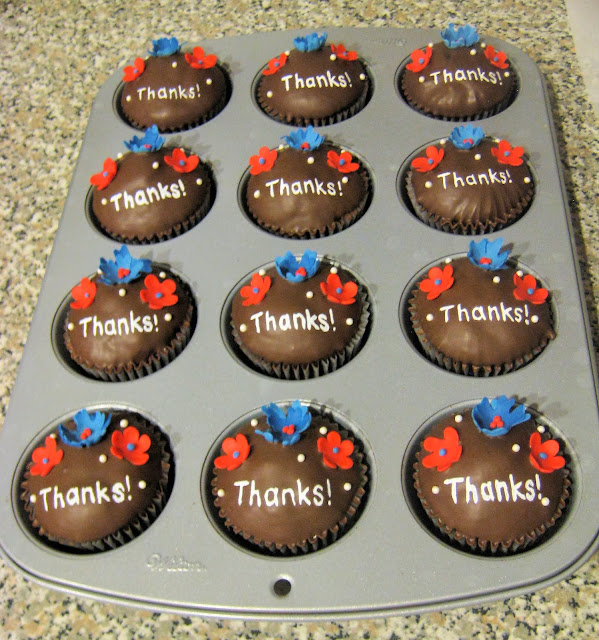
Teacher and Staff Thank You Cupcakes - Overhead View
 
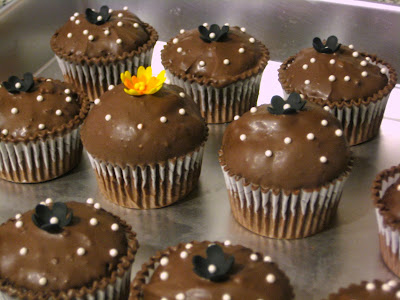
For these cupcakes I started out baking chocolate cupcakes and letting them cool completely.  I wanted the cupcakes to have a nice round dome shape to them, so I was happy that they cooperated and turned out that way.  :)

Teacher and Staff Thank You Cupcakes - Group Close-Up 2

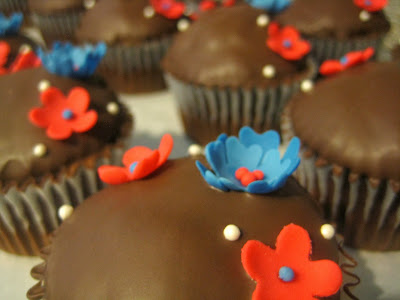
Teacher and Staff Thank You Cupcakes - Close-Up View 1

Teacher and Staff Thank You Cupcakes - Close-Up View 2

Teacher and Staff Thank You Cupcakes - Close-Up View 3
 
I made all my red and blue fondant flowers and let them dry.  I decided to dip the tops of these cupcakes in chocolate instead of icing them.  I wanted that smooth shiny look to them (and I could try out my new white food coloring again :) ).  So, I needed everything that I was going to top them with to be ready. 

Teacher and Staff Thank You Cupcakes - Group Close-Up 3

Teacher and Staff Thank You Cupcakes
 
I used chocolate almond bark as my cupcake topping.  I melted the almond bark according to the package directions in a small bowl that was deep enough to dip the cupcake tops without touching the bottom.  I dipped the cupcake tops in the chocolate and then placed my flowers and pearl sprinkles before the chocolate hardened.  Once they were all dipped and hardened I used white gel food coloring to paint 'Thanks!' on the cupcakes.
 
I was really pleased with how these cupcakes turned out.   I thought they looked pretty classy.  :)
 
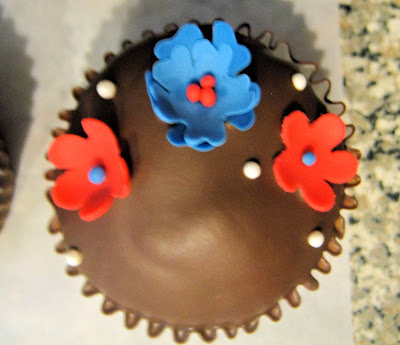
This is a cupcake that I made for my daughter, Carissa, to give to her GT teacher.  I ran out of little red flowers.
 Teacher and Staff Thank You Cupcake - Blue Flower Only
 
This is what the cupcakes looked like without writing on them.
Teacher and Staff Thank You Cupcakes - No Words - Close-Up 1

Teacher and Staff Thank You Cupcakes - No Words - Group Close-Up
 
The cupcakes below are the extra ones that I decorated for my family to enjoy.
Extra Cupcakes with Black Flowers and Yellow and Orange Flower

Extra Cupcakes with Black Flowers and Yellow and Orange Flower - Close-Up

Extra Cupcakes with Black Flowers and Yellow and Orange Flower - Overhead View


(Created animated name at this site.)
 

Sunday, December 29, 2013

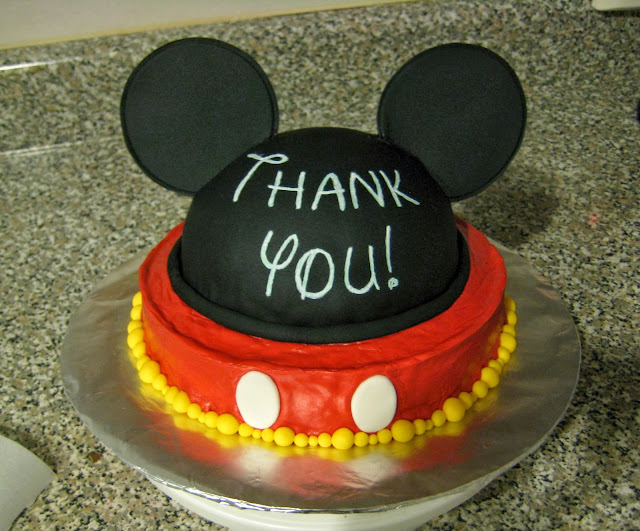
Mickey Mouse Ears Teacher Appreciation Cake - June 2013

I made this Mickey Mouse themed cake for my son, Caleb's, 5th grade teacher.  Our family had taken a trip to Disney World during the year and his teacher had shared with us how much she loved Disney World.  Later she told us that after she found out we were going she talked to her husband and they were going to go on a trip to Disney World in the summer.  :)  So, I thought this would be a special cake for her from us.  [She LOVED the cake!  :) ]

Mickey Mouse Ears Teacher Appreciation Cake 1

Mickey Mouse Ears Teacher Appreciation Cake - Angled View

Mickey Mouse Ears Teacher Appreciation Cake - Overhead View

Mickey Mouse Ears Teacher Appreciation Cake - Close-Up View

Mickey Mouse Ears Teacher Appreciation Cake 2
 
This is a picture of how the cake looked before the words were on it.
Mickey Mouse Ears Teacher Appreciation Cake - No Words View

At first I put a tail on the back of the cake, but ultimately I decided to not use it.  I didn't end up liking the way it looked from the front with the tail.  These two pictures are of different views when the tail was still on the cake.
Mickey Mouse Ears Teacher Appreciation Cake - Tail Attached Back View

Mickey Mouse Ears Teacher Appreciation Cake - Tail Attached Angled View
More details to come... :)
 
[Right now I'm just trying to get everything on the blog, then I'll go back and fill in details; you can read a little longer explanation here if you want. BUT if you have any questions in the meantime, in general or about this cake, please feel free to email me by clicking on the 'Contact Me' tab at the top of the page and using the email address found there, and I will try to get back with you as soon as possible. Or you can always ask questions or leave a comment about this cake by clicking the comments link at the end of this post. :)]
Andrea - Animated Name


(I created my animated name at this site.) 

Wednesday, October 9, 2013

Teacher Appreciation Garden Cake - June 2013

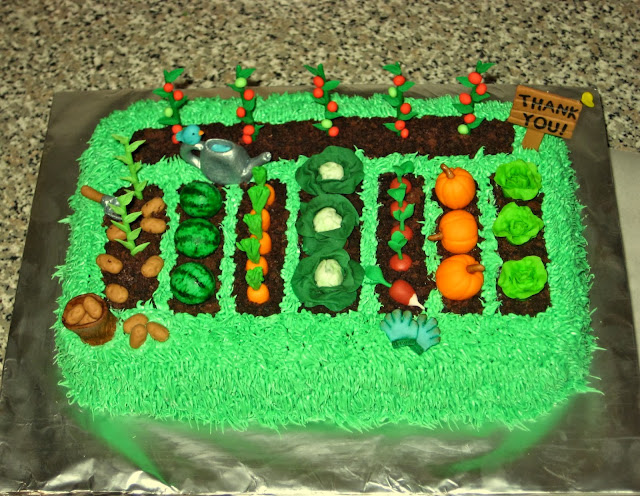
This is a cake that I made for my daughter, Carissa's, 2nd grade teacher as an end of the year thank you.  She loves gardening and even heads up the garden club at the school.  I knew this would be the perfect cake for her.

Teacher Appreciation Garden Cake 1

Teacher Appreciation Garden Cake 2

I first used a dry erase marker to sketch out a 'map' of the garden on the bottom of the glass pan that I would use to bake the cake.  I did this so I could get an idea of scale when I started making the fondant fruits and vegetables.  This really helped with keeping the sizes and spacing right as I went.

All the fruits, vegetables, and other items on the cake are made out of fondant.  Some of the details are done with edible food markers and some are done with food coloring.  I painted the watering can and trowel with silver airbrush food coloring. The fondant items were made before baking the cake so that they would have time to dry, especially things I needed to stay standing up.
 
Teacher Appreciation Garden Cake - Angled View

Teacher Appreciation Garden Cake - Back Angled View
 
For the actual cake I baked it in a 7x11 inch pan.  You could use whatever size suits your design.  After the cake was baked and completely cool I leveled the top.  I drew a quick outline of my garden rows on top of the cake with an edible food marker.  Then, I filled in the rows with some brown icing.  I used some of the cake that I leveled off the top for the dirt in the rows.  To do this I just crumbled the cake to the fineness that I wanted and sprinkled it on the icing.  I tinted some buttercream icing green and using a grass tip piped the grass everywhere left on the cake that wasn't covered in dirt (cake crumb dirt that is :) ).

After that all that was left to do was place the fondant pieces on the cake.  Yay, a finished garden cake!  Or so I thought... unfortunately how I chose to store the cake overnight caused the fondant to weaken where it was place in the cake and when I woke up my tomato plants, potato plants, and sign were all drooped over at the base.  :(  For the potato plants I was able to use the top that was above the cake still and they were just a bit shorter.  I repaired the bottom of the tomato plants and reinforced/stabilized them with toothpicks.  Oh well, now they just looked like someone had put a stake there for the tomato plant to grow on.  :)  To fix the sign I covered a toothpick in fondant and attached it to the back of the sign and post and stuck it into the cake.  I wish I could have made the repair look prettier, but it had to be a quick fix to get the kids and cake to school.  :)
 
Teacher Appreciation Garden Cake 3

Teacher Appreciation Garden Cake 4

I was so happy with how the cake came out; I thought all the little fondant pieces turned out really cute!  And... Carissa's teacher thought so too.  :)  She absolutely loved the cake!  Hooray!  :)
Andrea - Animated Name
(I created my animated name at this site.)

Saturday, July 20, 2013

Calvin and Hobbes Themed Cupcakes - April 2013

I made these Calvin and Hobbes themed cupcakes for my son, Caleb, to share with his class at school for his birthday.  (You can see his Calvin and Hobbes birthday cake here.)

Calvin and Hobbes Themed Cupcakes - Close-Up View of Cupcakes

Calvin and Hobbes Themed Cupcakes - Angled View

Calvin and Hobbes Themed Cupcakes 1

Calvin and Hobbes Themed Cupcakes  - Group of Calvin Cupcakes

Calvin and Hobbes Themed Cupcakes  - Group of Hobbes Cupcakes

Calvin and Hobbes Themed Cupcakes  - Close-Up Angled View

Calvin and Hobbes Themed Cupcakes 2

To make these cupcakes I layered some orange tinted cake batter (red for some) with some chocolate cake batter in cupcake liners and baked them.  I was trying to get a striped look inside, but I didn't do thin enough layers, so it was more like a one big stripe-ish look for most of them (see picture below), but oh well, still something different.  :)

Calvin and Hobbes Themed Cupcakes - View of Inside of Cupcakes
 
After the cupcakes baked and completely cooled, I iced the orange cupcakes with orange colored buttercream and the red cupcakes with red buttercream.  Then I piped black buttercream icing stripes on all the cupcakes.  Then using an open star tip (I think I used a #22) I piped white tufts of fur along the sides of the orange, Hobbes, cupcakes, and yellow spikes of hair along the top of the red, Calvin, cupcakes.  I did the Hobbes cupcakes first, and looking back, I think if I were to do it again I'd do the white fur tufts similarly to the hair I did on the Calvin cupcakes.  But I did like how the cupcakes came out, a little simplistic nod to Calvin and Hobbes.  :)
Andrea - Animated Name


(I created my animated name at this site.)

Wednesday, July 17, 2013

Calvin and Hobbes Snowman Cake - April 2013

I made this Calvin and Hobbes cake, featuring their very unique snowmen, for my son, Caleb, for his 11th birthday.  I loved Calvin and Hobbes growing up, so when I introduced it to my kids I thought it was cool that they liked it, especially Caleb, he really took off with it.  I was excited when he picked it for his birthday theme, and I pretty much immediately knew this was what I wanted to do for his cake.

Calvin and Hobbes Snowmen Cake 1

For this cake I baked one 12 inch round cake and two 6 inch round cakes.  A while back I had seen Duff Goldman's zebra striped cake mix in the store.  I thought it looked cool and was interested so I took a look at the back of the box to see how they said to do it.  When Caleb decided to have a Calvin and Hobbes party I thought it would be fun to use that technique to make the inside of the cake look tiger striped (and 'Calvin striped' (red and black like his shirt) for other cakes).

Calvin and Hobbes Snowmen Cake - Tiger Striped Inside of Cake and Cake Slice
 
I used a chocolate cake mix and a white cake mix that I colored orange by putting food coloring in the batter and followed the directions that I had seen for the Duff zebra cake.  The two 6 inch cakes I made tiger striped, and the 12 inch cake had some Calvin stripes next to some Hobbes tiger stripes with white cake batter that I mixed up in addition around it to look like snow.  (I took part of that white cake batter and added red to it to make the red for the Calvin stripes.)
 
After the cakes were completely cooled I leveled them and stacked them (icing in between).  I stacked the 6 inch cakes a little off center towards the back of the 12 inch cake (which was off center towards the back of the cake board) to give room for my snowmen and other items.  I crumb coated the cakes and let the icing set.  Then I iced the cakes and the cake board with white buttercream purposely going in different directions leaving visible lines and some peaks to give it that snowy look.

Calvin and Hobbes Snowmen Cake - Angled View
 
Calvin and Hobbes Snowmen Cake - Tiger Striped Inside of Cake
 
All the figures and other items on the cake I made of fondant ahead of time.  I found all the different snowmen Calvin had made in the comics and then let Caleb choose several that he wanted.  I had him put them in the order he wanted from most to least in case I couldn't get to them all.  I think I was able to get all but one done, the snowman swimming away from the snow sharks.  Well, the one holding his head out in front of him I decided not to do for the logistics of it and the time it would take to make it work.

Calvin and Hobbes Snowmen Cake - Comic Frame of Two Headed Snowman by Bill Watterson
Calvin and Hobbes Comic Strip by Bill Watterson
Calvin and Hobbes Snowmen Cake - Two Headed Fondant Snowman

Calvin and Hobbes Snowmen Cake - Fondant Snowman with Shovel and Snowman Buried in Snow
Calvin and Hobbes Snowmen Cake - Comic Frame of Snowman with Shovel and Snowman Buried in Snow by Bill Watterson
Calvin and Hobbes Comic Strip by Bill Watterson


Calvin and Hobbes Snowmen Cake - Comic Frame of Little Snowman Sledding Sledding Through Snowman by Bill Watterson
Calvin and Hobbes Comic Strip by Bill Watterson

Calvin and Hobbes Snowmen Cake - Fondant Little Snowman Sledding Sledding Through Snowman
 
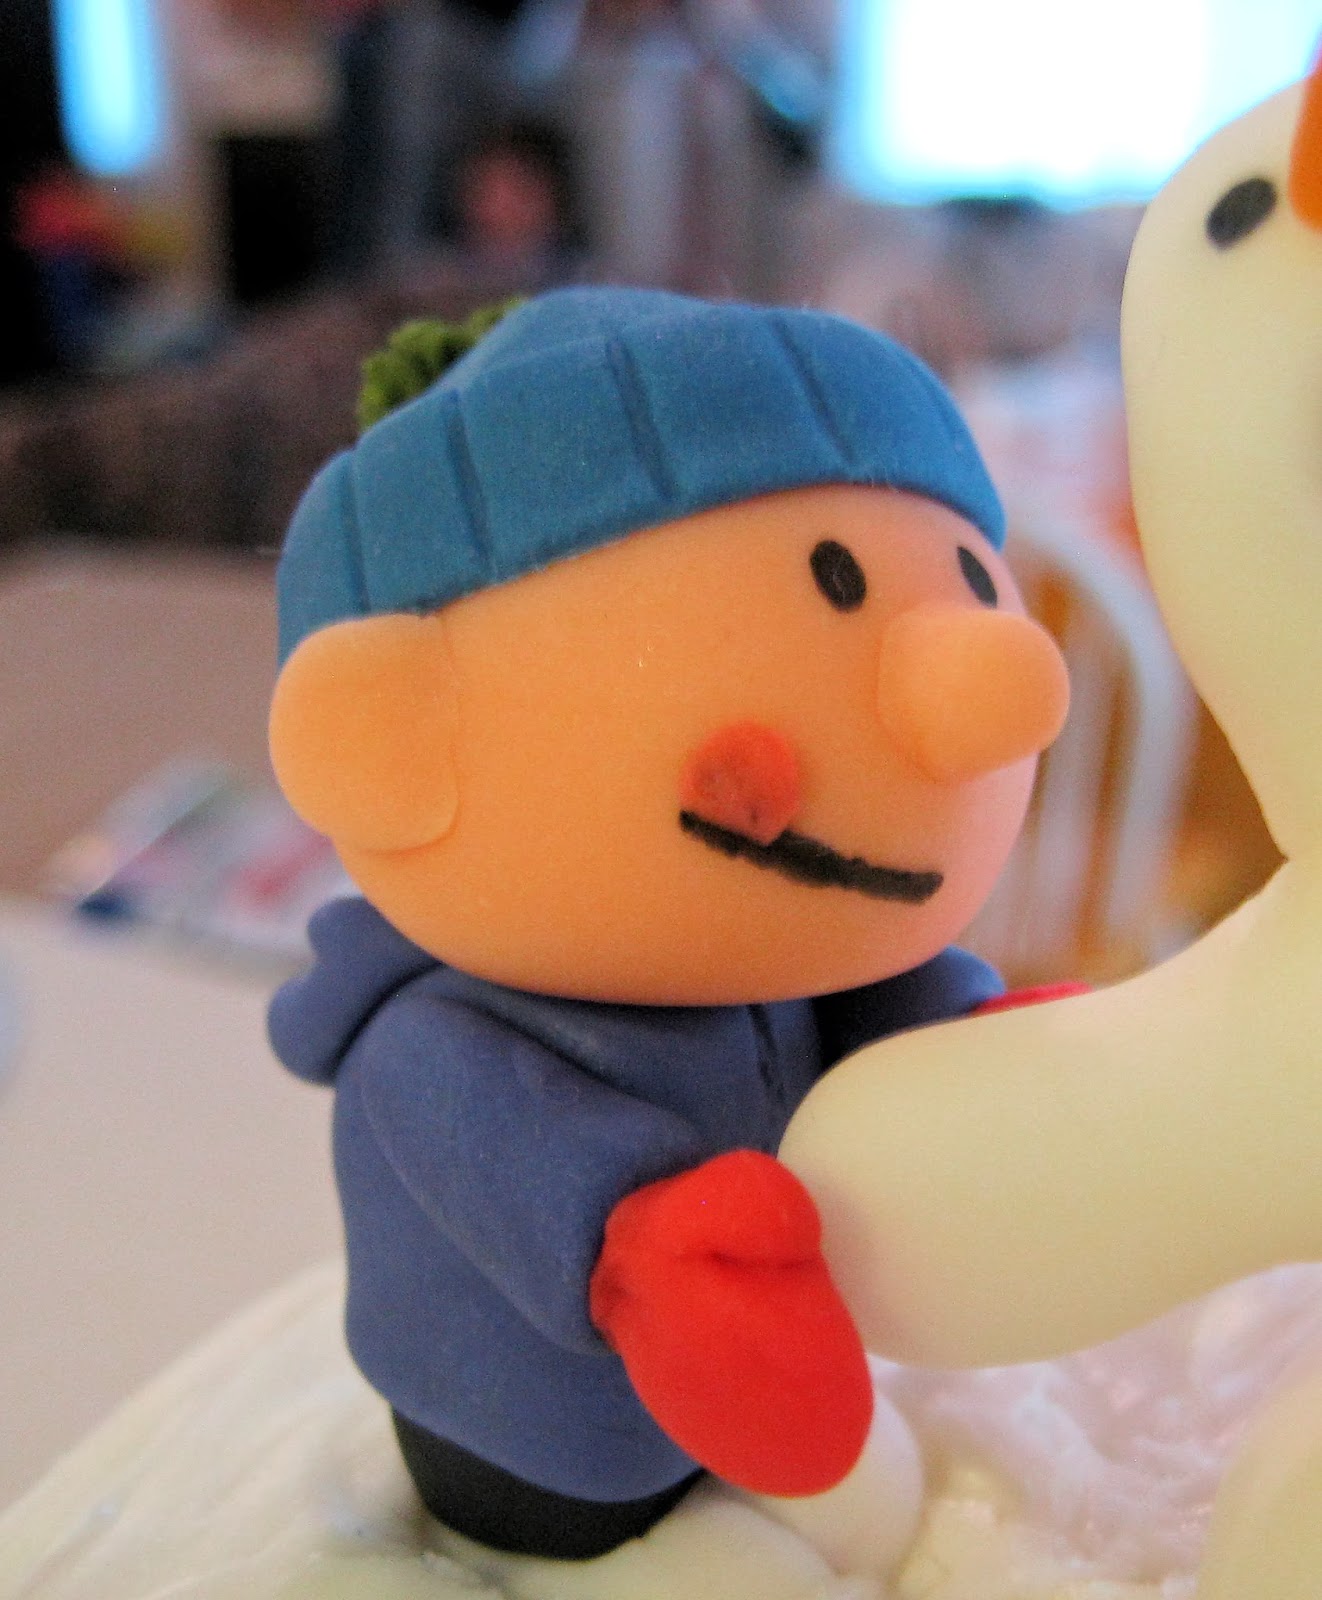
I had the pictures of the snowmen (and multiple pictures of Calvin and Hobbes) right next to me and constantly referenced to them as I was making all the figures to try and get them to look just like they did in the comics.  The bodies of the snowmen are made with white fondant shaped for how each particular snowman looked.  For the mouths that were open I made using a fondant tool to shape them.  I made the little carrot noses out of orange fondant, let them dry a just little bit, and attached them to the snowmen using a dab of water.  The arms are made of brown fondant.  I let the arms dry so they would hold their shape when they were on the snowmen.  When I attached them I made a small hole in the snowman's body with a toothpick and then inserted the arms.  I made a couple extra in case any of them broke.  I used a black food coloring marker for the eyes, mouths, and buttons (and the words on the sign).  The two hats on the snowmen are made from fondant as well as the sled the little snowman is on.  The snow shovel and sign are made of fondant except for the sticks which are toothpicks.  For the tiny snowmen I forget if I pinch their arms out from the bodies or if I attached a little pinch of fondant to the bodies.  I think it might have been the first way.  Whichever way it was they were painted with a dab of brown food coloring. 

Calvin and Hobbes Snowmen Cake - Fondant Mutant Snowman

Calvin and Hobbes Snowmen Cake - Comic Frame of Mutant Snowman by Bill Watterson
Calvin and Hobbes Comic Strip by Bill Watterson
Calvin and Hobbes Snowmen Cake - Fondant Giant Snowman Scaring Tiny Snowmen
Calvin and Hobbes Snowmen Cake - Comic Frame of Giant Snowman Scaring Tiny Snowmen by Bill Watterson
Calvin and Hobbes Comic Strip by Bill Watterson

Calvin and Hobbes Snowmen Cake - Fondant Picketing Snowman 1
Calvin and Hobbes Snowmen Cake - Comic Frame of Picketing Snowmen by Bill Watterson
Calvin and Hobbes Comic Strip by Bill Watterson

Calvin and Hobbes Snowmen Cake - Fondant Picketing Snowman 2

Calvin and Hobbes Snowmen Cake - Fondant HobbesI made Hobbes and his scarf out of fondant with his eyes and stripes drawn on with a black food coloring marker.  I set his arms aside to dry before attaching them because I wanted them to stay how I put them once I attached them.  When I went to attach them they didn't sit against the body exactly right and I had to work with them a bit to get them attached and looking okay.  So, I didn't get them positioned exactly how I had wanted.  Looking at him after he was together, I would have wanted his arms to be a little more relaxed looking and his head to be looking down towards the snowman, but I was still very happy with Hobbes' overall look.

Calvin and Hobbes Snowmen Cake - Calvin and Hobbes on Sled Comic Strip Frame by Bill Waterson
Calvin and Hobbes Comic Strip by Bill Watterson
 
Calvin and Hobbes Snowmen Cake - Fondant Calvin 1All the elements of Calvin were also made with fondant with his eyes and mouth drawn on with a black food coloring marker.  I did let his arms dry some also, but I didn't wait as much as I did with Hobbes' so I could have a little more give in the body and arms when attaching them.

Calvin and Hobbes Snowmen Cake - Calvin Rolling a Snowball Comic Strip Frame by Bill Waterson
Calvin and Hobbes Comic Strip by Bill Watterson


After I iced the cake I got some more icing and put a blob of it on the cake board to look like a mound of snow.  Then I put the fondant sled I'd made sticking out of the snow to look like Calvin and Hobbes had crashed it in the snow.  Then I started at the top cake layer and made a furrow in the icing down the side of the cake and on the top of the bottom cake layer to make it look like they had sledded down the cake before they crashed.
 
Next I placed my fondant snow fort and pile of snowballs on the bottom cake.  I had some extra snowballs that I didn't need for the snowball pile so I decided to use them to make an 11 on the side of the top cake like they had thrown them there.
Calvin and Hobbes Snowmen Cake - Fondant Snowfort and SnowballsCalvin and Hobbes Snowmen Cake - Eleven Made from Fondant Snowballs
 
Then I started placing the snowmen and Calvin and Hobbes on the cakes and cake board.  After I placed the little snowman on the sled and the snowman it sledded through I made a little furrow in the icing following after the sled.  I knew I had made my little sled too short, but I didn't notice until after that the little snowman's sled in the comic is really long and extends all the way past the other side of the snowman he sledded through.  Grr...

Calvin and Hobbes Snowmen Cake - Fondant Hobbes Close-Up

Calvin and Hobbes Snowmen Cake - Fondant Calvin 2

Calvin and Hobbes Snowmen Cake - Overhead View

I also made a 6 inch 'Calvin striped' cake with the leftover batter that I had.  I used that 6 inch cake and the top from leveling it as well as the tops from the leveled 6 inch tiger cakes to make a 'snowball' cake for extra cake at the party.

Calvin and Hobbes Snowmen Cake - Extra Snowball Cake Outside and Calvin & Hobbes Striped Inside

Calvin and Hobbes Snowmen Cake 2
 
I was super excited and so pleased with how the cake turned out.  I thought it really captured the characters well and the spirit of Calvin and Hobbes.  I loved how the inside of the cake came out as well.  Everyone thought the tiger stripes were really cool.  Caleb absolutely loved the cake and was really excited about it as well.  :)  The kids and adults at the party thought it was awesome, especially those familiar with Calvin and Hobbes, they really thought it was great.  :)
Andrea - Animated Name


(I created my animated name at this site.)
 

LinkWithin

Related Posts Plugin for WordPress, Blogger...