Showing posts with label Christmas. Show all posts

Thursday, February 16, 2017

Christmas Chocolate and Peppermint Mini Cupcakes - December 2014

Why did I make an army of mini cupcakes you ask?  Well... we gave some to my daughter Carissa's two teachers.  My husband took some to one of his clients at work and used some for part of his gift he was bringing for a gift exchange at work.  We gave our good friends a container of them, and a container of them went to a bake sale my son's band was having.  We kept the extra ones for us to enjoy at home and to share with family.  In total there were 114 mini cupcakes!

Christmas Chocolate and Peppermint Mini Cupcakes 1

Christmas Chocolate and Peppermint Mini Cupcakes 2

The next two pictures were taken before I put the leaves on the cupcakes with the red sixlets on them, but the first one shows the cute part of the white cupcake liners.  It gets hidden when you use them. 😕  These pictures also show the cupcakes with the white and green sixlets on them a little closer and better.  And of course you could choose not to put the leaves on and just leave it topped with the red sixlet.

Christmas Chocolate and Peppermint Mini Cupcakes - Showing Peppermint Cupcake Liner

Christmas Chocolate and Peppermint Mini Cupcakes - Closer View of Green & White Sixlet Cupcakes

Christmas Chocolate and Peppermint Mini Cupcakes - Closer View of Holly Berry Cupcake 1

Christmas Chocolate and Peppermint Mini Cupcakes - Closer View of Holly Berry Cupcake 2

Christmas Chocolate and Peppermint Mini Cupcakes - Holly Berry Cupcakes

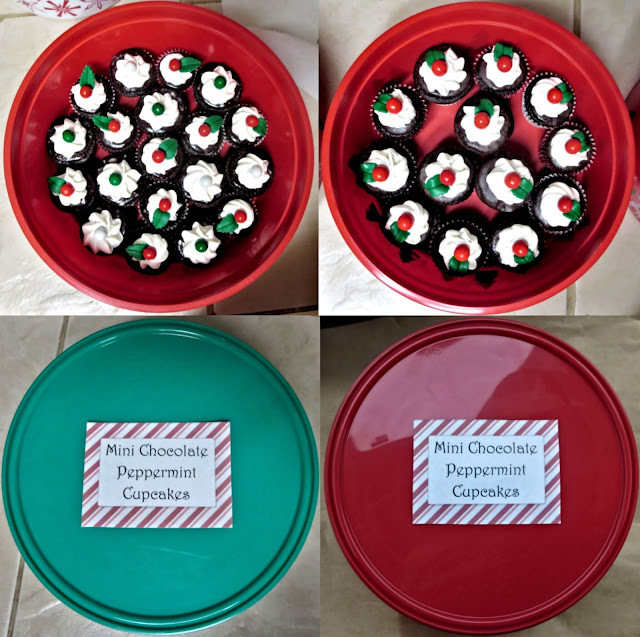
Christmas Chocolate and Peppermint Mini Cupcakes - Grouped in Containers

I put the cupcakes in some plastic Christmas themed containers and attached little peppermint labels that I'd made to the lids.

Christmas Chocolate and Peppermint Mini Cupcakes - Overhead View of Grouped in Containers and Lids with Labels

Everyone loved the cupcakes!  Yay!  ðŸ˜„

More details coming soon... 😊
Andrea - Animated Name


(I created my animated name at this site.)

Thursday, February 9, 2017

Have a Holly Jolly Christmas Cupcake - December 2014

I made these chocolate and peppermint holly berry cupcakes for my husband to give to his employees for a Christmas treat.  

Christmas Holly Berry Chocolate Peppermint Cupcakes - Close Up 1

Christmas Holly Berry Chocolate Peppermint Cupcakes 1


Christmas Holly Berry Chocolate Peppermint Cupcakes - Close Up 3

Christmas Holly Berry Chocolate Peppermint Cupcakes 2

Christmas Holly Berry Chocolate Peppermint Cupcakes 3

Christmas Holly Berry Chocolate Peppermint Cupcakes - Boxed
All boxed and ready to go!

I had some batter left so I made some for us to have at home and share with family.  I used some poinsettia cupcake liners that my sister Valerie had bought me, and I played around with some different decorations for these.

Christmas Chocolate & Peppermint Cupcakes - Poinsettia Wrappers & Various Decorations 1

Christmas Chocolate & Peppermint Cupcakes - Poinsettia Wrappers & Various Decorations 2

Christmas Chocolate & Peppermint Cupcakes - Close Up of One Cupcake with Poinsettia Wrapper

More details to come... :)
Andrea - Animated Name


(I created my animated name at this site.)


Thursday, November 19, 2015

Homemade Christmas Cookies - December 2013

My son's band was doing a Christmas cookie sale at one of their concerts.  I made the music note cookies (and some of the circle ones) for the fundraiser, and then I used some of the extra cookie dough to make some Christmas cookies for home.

Homemade Christmas Cookies 1

To make the cookies I just followed a recipe for cut-out sugar cookies.  After the dough was mixed, I separated it into two bowls.  I used green food coloring to make the dough in one bowl green, and I used red food coloring for the other.

Homemade Christmas Cookies - Making Green & Red Striped Dough

For the music note cookies I took red and green cookie dough and rolled them into fat snakes.  Then, alternating the colors, I put them together and rolled them out into a long strip.  I used a music note cutter to cut the notes out of the striped dough.  

Homemade Christmas Cookies for Band - Music Note Close-Up

After I got all the notes I could cut out of my striped dough, I gathered it up and rolled it out again.  The  notes on the top row (below) were cut from that dough, and they had more of a marbled look.  I also cut out some circles and stars to finish getting our amount of cookies we needed to bring.

Homemade Music Note Christmas Cookies for Band

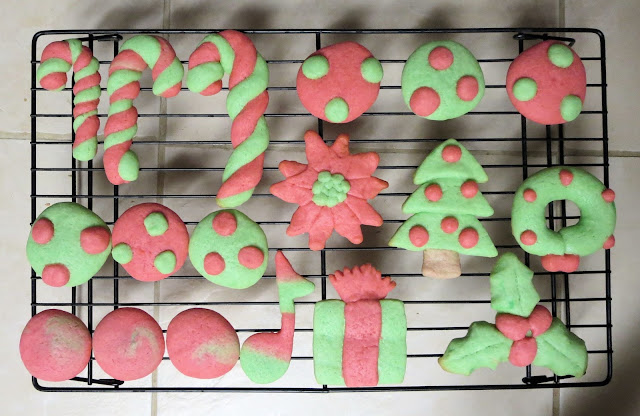
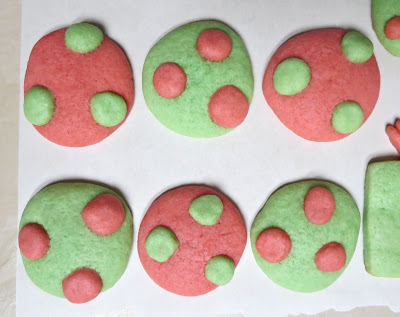
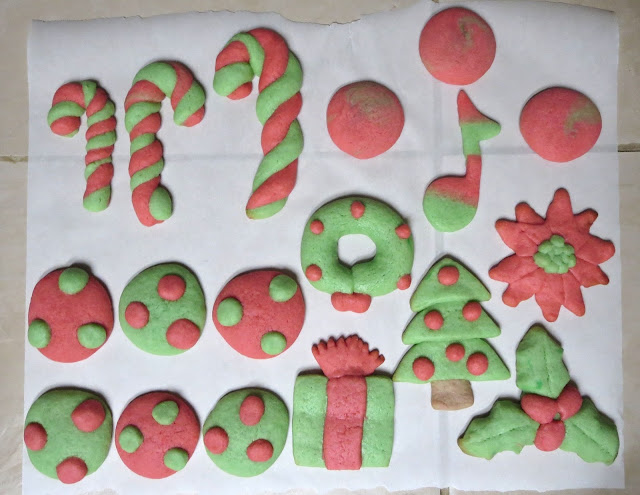
The cookies below are what I made with the remaining dough.  I used some cutters and did some freehand.  For some (like the wreath) I treated the cookie dough like Play-Doh, rolling it into balls or snakes to make the various cookies or cookie parts.

Before:

Homemade Christmas Cookies - Wreath, Poinsettia, Tree, Present, Holly Berries - Before Baking

After:

Homemade Christmas Cookies - Wreath, Poinsettia, Tree, Present, Holly Berries - After Baking

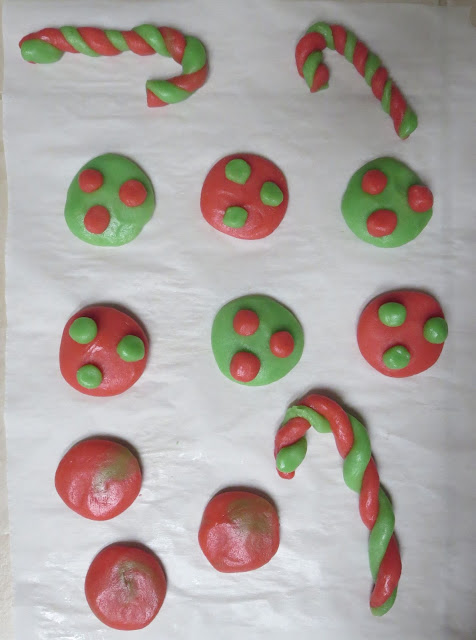
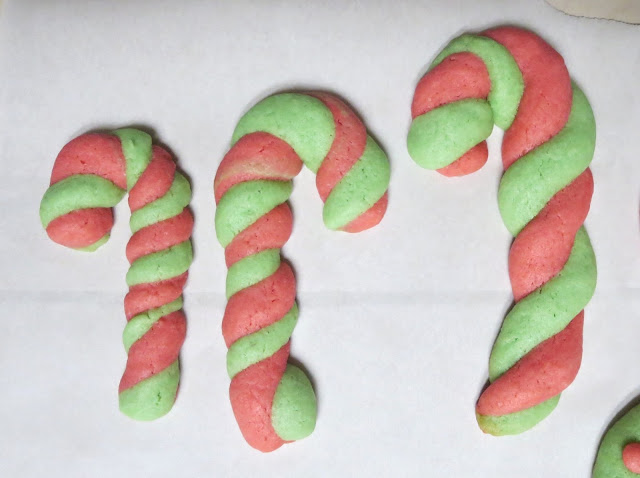
For the candy cane cookies below I made a long snake of red and a long snake of green, twisted them together, and then formed the twist into the shape of a candy cane.

Before:

Homemade Christmas Cookies - Before Baking

After:

Homemade Candy Cane Christmas Cookies - After Baking

Homemade Christmas Cookies - After Baking

Homemade Christmas Cookies 2

Merry Christmas!
Andrea - Animated Name
(I created my animated name at this site.)

Monday, April 9, 2012

Away in a Manger... - December 2011

We made these 'Happy Birthday, Jesus' brownies to share at Christmas with our family.  My kids told me that they wanted to make something like a cake to celebrate Jesus' birthday.  It was brought up kind of at the last minute so I knew we wouldn't have time to do anything 'major', but they were really excited about it so I wanted to let them do something.  We decided to make brownies and let them pipe the drawings on with white icing.  This would be quick, but still lots of fun and something yummy they could share at our family dinner.

Christmas Nativity 'Happy Birthday Jesus' Brownies 1

We bought a box of fudge-y brownie mix, and made them according to the directions on the box.  The kids all decided what they wanted to put on the brownies, and after the brownies cooled completely they took turns piping on their ideas.  Cara started with the star, Caleb drew the angel (the one to the left of the star - for the picture further down that shows two angels), I piped the outline of the stable for them, and Carissa drew Baby Jesus in the manger.  Everyone added one more thing to the brownies; Cara drew Mary, Caleb drew Joseph, and Carissa drew the camel sticking its head in from outside.  :)  I wrote 'Happy Birthday, Jesus' on the front side of the brownies.

Christmas Nativity 'Happy Birthday Jesus' Brownies 2

Ronnie came home while we were finishing up, and the kids wanted him to contribute to the creation also.  So, he drew the angel to the right of the star [I thought I got some close-up pictures of the brownies after Ronnie drew the angel, but they are nowhere to be found.  So there is just a not-so-great-quality-picture-that-was-taken-from-far-away below.  :( ]

Christmas Nativity 'Happy Birthday Jesus' Brownies 3

The kids (and Ronnie and me) really enjoyed getting to make these brownies, and I loved watching them and their creativity while they worked on them.  :)  Oh, and they were yummy, too!  :)
Andrea - Animated Name
(I created my animated name at this site.)

Monday, March 26, 2012

Peppermint Frost Cake Balls - November 2011

I made these peppermint cake balls for a cookie/treat exchange that my mom was hosting.

Christmas Peppermint Frost Cake Balls 1

Christmas Peppermint Frost Cake Balls - Close-Up View of Cake Ball 1

My mom was over while I was making them and she mentioned something about peppermint frost, I thought it was cute, so I named the recipe Peppermint Frost Cake Balls.  :)

Christmas Peppermint Frost Cake Balls 2

(I followed the basic recipe and process for making cake balls from Bakerella's website found here; I just changed it how I needed to make it work for my peppermint cake ball recipe.) 

Christmas Peppermint Frost Cake Balls - Close-Up View of Cake Ball 2

Christmas Peppermint Frost Cake Balls - Close-Up View of Cake Ball 3

To make them you will need:
-1 box classic white cake mix (cook as directed on the box for a 13x9 cake)
-1 can cream cheese frosting (16 oz.)
-1 package chocolate flavored almond bark
-peppermint candies
-red food coloring
-wax paper or parchment paper

1. After the cake is cooked and cooled completely, break it in pieces into a large bowl.  You can use a fork to help get it broken up.

2. Start out by mixing ¾ of your frosting thoroughly with your cake crumbs.  I use a big metal spoon to smush it all together.  Roll one ball to test, then decide if you need to add more frosting.  [It should be moist and stay together, but you don’t want it to be gloppy.]  Some people use their fingers to mix it together, but it gets messy.

3. Get about 8-10 peppermint candies and crush them into a fine powder [you’ll have some bigger pieces which you can use later to top the cake balls.]

4. Mix the peppermint powder into your cake ball mixture to taste.

5. Divide the cake ball mixture into 2 bowls.  Add the red food coloring to one bowl until you reach the desired shade you want.

6. Take equal parts of the mixture from each bowl, roll it into quarter size balls, and lay on cookie sheet [I line mine with wax paper or parchment paper].  [This recipe should make 50-60 cake balls depending on the size you roll them.]

Christmas Peppermint Frost Cake Balls - Rolled Cake Balls Before Covered in Chocolate
They will look something like this.  :)

7. Chill them for several hours. [You can speed this up by putting them in the freezer – that’s what I usually do. :)]

8. Melt the chocolate in a bowl in the microwave according to the directions on the package.  [I only melt a few pieces of chocolate bark at a time because it starts to cool and thicken, and it’s easier to work with when it’s hot.]

9. Put one cake ball at a time in the chocolate.  [Use a spoon to cover the top of the cake ball and then get it on the spoon and tap off the extra chocolate.]

10. Lay it on wax or parchment paper and top immediately with your crushed peppermint.  Then wait until they are firm.  If your chocolate gets firm before you top it with the peppermint you can put a little of the chocolate on the top and put the peppermint on, it just won't have as smooth as a look to it.

Since I was making these for an exchange I plated a 1/2 dozen cake balls each on cute red square plates with a peppermint in the middle and wrapped the plate with plastic wrap.

Christmas Peppermint Frost Cake Balls - Plated Cake Balls 1

Christmas Peppermint Frost Cake Balls - Plated Cake Balls 2

Christmas Peppermint Frost Cake Balls - Plated Cake Balls 3

Christmas Peppermint Frost Cake Balls - Plated Cake Balls 4 - Overhead View

Here are a couple pictures of the inside too!  Yummy!  :)

Christmas Peppermint Frost Cake Balls - Inside of Cake Ball 1

Christmas Peppermint Frost Cake Balls - Inside of Cake Ball 2

I had fun making these peppermint cake balls!  I thought they were cute, and they tasted yummy!  :)
Andrea - Animated Name
(I created my animated name at this site.)
 
Parties I've Linked This Post to:
Creative Bloggers' Party & Hop - Homemaker on a Dime
Made by You Monday - Skip to My Lou
Just Something I Whipped Up - Project Inspire
Show Me What You Got - Our Delightful Home
Tuesday To Do - The Blackberry Vine
Whatever Goes Wednesday - Someday Crafts
Christmas Catergorically Crafting - Someday Crafts
What I Whipped Up Wednesday - Sugar and Dots
{wow me} wedneday - Ginger Snap Crafts
Cast Party Wednesday - Lady Behind the Curtain
Sweet Treats & Swanky Stuff Saturday- Something Swanky
Strut Your Stuff - Somewhat Simple

Monday, September 12, 2011

Now We Just Need a Really BIG Christmas Tree Cake - December 2009

I made this Christmas ornament cake for my daughter, Cara's, 5th grade Winter Party.  This was at the same party as the snowman cake that I made (see post - Frosting the Snowman, was a Jolly Happy Cake...).

Christmas Ornament Cake 1

Christmas Ornament Cake - Overhead View
Christmas Ornament Cake - Level View
Christmas Ornament Cake - Side View 1
Christmas Ornament Cake 2
Christmas Ornament Cake - Side View 2
Christmas Ornament Cake 3
More details to come!  :)

[Right now I'm just trying to get everything on the blog, then I'll go back and fill in details; you can read a little longer explanation here if you want.  BUT if you have any questions in the meantime, in general or about this cake, please feel free to email me by clicking on the 'Contact Me' tab at the top of the page and using the email address found there, and I will try to get back with you as soon as possible.  Or you can always ask questions or leave a comment about this cake by clicking the comments link at the end of this post.  :) ]
Andrea - Animated Name

LinkWithin

Related Posts Plugin for WordPress, Blogger...